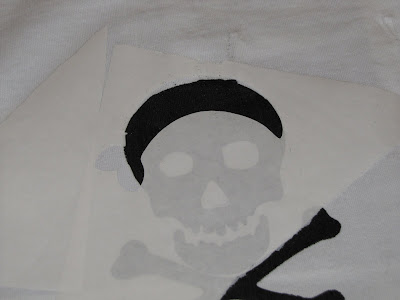
Big Brother can't go to the party without his very own pirate shirt! Matty B will be wearing a water shirt with a skull and bones, so he is set. So I wanted to make sure John was festive too! This is what I came up with...trying not to make it to 'skull-y' because I don't really love skulls on babies. :)


I think this shirt turned out with a perfect mix of pirate and party. Don't you?!
So, let's get down to the nitty gritty of how to make this precious shirt. (If you aren't super crafty and want to buy one of these pirate shirts, go HERE!)
Supplies:
-t-shirt (I got mine at Walmart and had to take off the front pocket first)
-fabric paint, paint brush
-freezer paper
-iron
-small scrap of fabric
-fusing (like Heat N Bond)
1. I found a picture of skull and bones online from Polish the Stars. Then I used my Sure Cuts Alot to cut out the image onto freezer paper on the circut. (I am still LOVING the cricut! My mom had to give the 'the talk' about sharing with my sisters. Bet she didn't think she would have to do that with her 30 year old daughter!).
2. Iron the freezer paper to your shirt. Then fill in with black paint. If you need more specific directions on freezer paper and using the cricut, see this old post: HERE


3. Remove freezer paper from shirt and it should leave the skull and bones neatly painted on your shirt. Awesome!
3. I used a cricut cartridge I had on hand to cut out a bandana shape. (It was the paper doll cartridge which has super cute stuff on there!). I ironed it on top of the skull, but be careful because the paint will smear. So try not to smear black paint all over your shirt! Then fill in with red paint. This took several coats to cover over the black skull.


4. After removing the freezer paper, I used the end of a paint brush to add white dots to the bandana. I did this to help blend the red because it didn't cover the black evenly.

5. I made a little party hat by cutting a small triangle from my scrap material. I then used fusing (ie Heat N Bond or Wonder Under) to iron it to the shirt. Again, be careful not to smear paint all over your shirt! I then took small strips of the scraps to make a little poofy part for the top of the hat. I sewed those directly to the shirt. And because I want to be extra cute, the scrap material is from a fabric bunting I am making for party decorations. John will match the decor! hahaha!

And there you have it. A precious pirate party shirt. I can't wait for John to wear it at the party! Like I said before, keep checking back to see what else I have up my sleeve for this party!


I link up to these parties!


Hi saw you on allfreesewing newsletter.
ReplyDeleteI love this post, I have been looking for pirate themed posts as my youngest needs to dress up as a pirate soon!
New google follower, Karima from
www.karimascrafts.com
Fantastic job!
ReplyDeleteI really like how you added the turquoise in there too. Really makes it pop and is unexpected too!
Kerri
you did a great job! what a fun idea! I found your blog through a link party! I am your newest follower and would love it if you would check out my blog and follow me too! Thanks!
ReplyDelete-Nikki
http://chef-n-training.blogspot.com/