Feb 27, 2011

C is for CARS {week 1}

We had a fabulous week working on the letter c using all of John's cars. It actually turned into cars and other modes of transportation since John has so much of those toys around here. It is crazy how all those types of toys have accumulated around here! John showed a lot more interest in this week's activities and only said 'mommy do' for maybe two of the planned activities.

This week I changed things up slightly, only because we had so many themed toys and I organized it all one night while the boys were sleeping. I loaded up all the tot trays, put car themed books in a bucket, and put extra car themed toys all in the 'school' area in our dining room. So, when it was time for school, we ended up staying in that area for a long time just playing with all the fun stuff instead of going back to the living room where we usually play. I think that really helped us get much more accomplished this week and John seemed to be having fun! I also was able to pull out some baby toys so Matthew could join in the fun!

In case any of you were wondering, this is what our little area looked like. We had our small bookshelf with the tot trays and extra toys...


...our books that matched the theme (well, some were in John's room since he wants us to read those for naps!)...


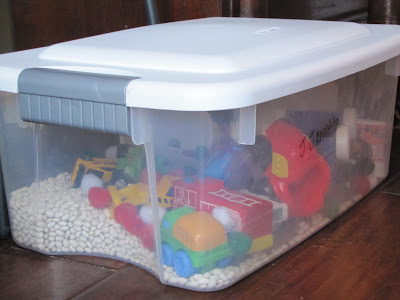
...and our sensory bin.


So, here is what we did...or at least what I got pictured! and fair warning- lots of pictures in the post!!!

John completed this train puzzle several times this week. I was so proud of him because he did it all by himself and didn't need my help! He was so proud of himself and would say 'Mommy, look what I did!'. Too cute!


He worked on more puzzles. I got these from the dollar spot at Target at Christmas...


I use cards of transportation items and road signs and found objects that we had around the house. I put the objects in a box and layed the cards out on the table. John had to match put the objects with the correct card. So, really it was just another easy matching game, but just presented in a different way. I was SUPER impressed because John put the stop sign and do not enter sign in the wrong spot but self-corrected without me saying anything to him. We did this activity twice and even though it was easy for him, we were able to connect to our week's theme.


John and his cousin, Bella, painted using their cars and then had a car wash in the backyard to clean them off. Those two kids had a blast with this activity!


They also played with the sensory bin.


John got a 'Cars' marker book for his birthday so he colored with that a couple times. I love that these are 'magic' markers that don't mark anywhere but the paper, although I don't love that there is a bit of a delay for the color to appear on the paper when you actually use the markers. Guess that is the price you pay to not have your house colored with markers!


We used color cards from PreKinders to sort John's cars by color. He was too funny and had to have the cars all facing the same direction. Since we had a TON of cars by the end (30 to be exact...we counted!) we took turns pulling a car from the box and putting it in the correct column. I know you are supposed to let your kids do these type of things on their own, but I thought he might get burnt out on the activity AND he can always use practice on taking turns! I put the cards across horizontally so that way we could also indirectly be graphing with the cars. We counted each column of cars at the end and John was able to count most of them correctly. Yay!!


I found this Cars stamp set at the Dollar Tree. It was a short lived activity, but the set came with paper, three stamps, ink pad, and stickers. All for a DOLLAR!!! What?!??! I also got a Cars puzzle, but we didn't get around to doing that one.


We used the Shape Book from this tot pack. John wasn't super interested in it, but he did find all the shapes on the cars so I guess that is what counts!


We read lots of books, including 'Red Light, Green Light'. After I read it to John and Bella, I taught them how to play. It was so cute! John mostly understood how to play even though he didn't stop running right when I said red light. Bella just copied what John did! :)


Using a printable from 1+1+1=1, John matched pictures of cars with the correct number of cars. John can get 1, 2, and 3 perfectly and would automatically guess 5 without counting when he saw several cars in the picture. So, at least I know he knows that 5 is more than 3 so it is a reasonable guess! :)


Using printables from Homeschool Creations, John practiced 'spelling' car, boat, and plane. We only got about half way through this activity when he lost interest.


Last, but not least, we painted a traffic sign from www.theprintableshare.com.


Holy canoli, we did a lot this week!!!

Tiny Tot with Matthew (who is 7 months this week! how crazy is that?!)...

Playing with transportation snap toys:


Playing with a steering wheel toy:


John had to play too!


Reading a transportation book:


Is anyone still reading anymore? Leave me a comment about this post and I will do a giveaway for being such a wonderful reader and powering through the longest post EVER! Being totally serious! I think John had fun, don't you?! Guess I had better get started on gathering stuff for Letter C Week part II while John is at Nana's for the night! :)


I link up to these parties!

Feb 21, 2011

Infant School Spirit T-shirt Dress

I finally sewed again this past weekend! I feel like I haven't made something cute in a while! Well, I guess I made burp cloths recently, but they weren't as fun to make.

I took this pile of stuff...


and turned it into this...


Seriously, how cute is this little baby dress?! Let me explain a little bit about the design. When I was teaching, I was the Varsity cheer coach for a couple years. Once I had John, I stopped coaching cheer because it takes up a TON of time and I obviously wanted to be home with my precious new baby. My assistant coach, Lauren, took over for me. Well, she had a baby 3 months ago and Lauren's hubby coaches baseball at the school, thus she will be taking baby Piper to games all the time. Soooooo, I wanted to make her a cute outfit using my old WHS shirts since I don't really have use for them right now. And let me tell you, when you coach a high school cheer squad, you get TONS of shirts. Multiply that over 4 years, I have WHS shirts coming out my ears!

So, here is how I did it and hopefully it makes sense to you! I am already thinking of new versions, so hopefully I can crank out another tutorial or two soon

Supplies:
-spirit shirts (or any old t-shirts)
-onesie
-sewing supplies such as sewing machine, thread, rotary cutter, etc.

1. I cut the cute parts of the shirts into strips that were about 1-2 inches wide. I just kind of lined them up to see how I wanted it to be on the dress. What I for sure wanted was the top strip to be the same color as the onesie, so it blended well. I also cheated by making the bottom strip the original hem from one of the t-shirts. Yay for no hemming in this project!


2. Once I found an order and placement I liked, I sewed the strips together, first pinning right sides together. {NOTE: If I was going to sew this dress again, I would have placed the strips better. I wanted some of the wording purposefuly to the side of the dress, but I didn't offset it enough. I think it looks like I just didn't center everything correctly. Just a little FYI!} After sewing all the strips together, iron along all the seams.


3. I did the same thing with plain strips for the back of the dress. I used the back of the shirts so they are the same colors...{and actually just cut them out all at once.}


4. I then set my stitch length as long as it would go on my machine and set the tension tight. I sewed across the top of the front and back piece so that it gathered it up. DO NOT back stitch at the beginning or end when you sew this time!


5. I needed to figure out how wide I wanted the front piece to be. SO I layed it across the onesie and kind of folded it around the onesie until I found a width I liked. Then using a disappearing marking pen, I marked on the sides where to sew.


You can barely see in the below picture some purple marks on the material that marks a diagonal line on each side. I cut a diagonal line about an inch past each purple line so I had a nice edge instead of all the scrappy edges hanging around. I only did this to the front piece.


6. I layed the back piece face up on my counter and then layed the top piece face down. I pinned the sides and sewed along each side, using the front piece side edges as a guide.


7. Trim your edges on the back piece (which I think is much easier than cutting the front and back piece before sewing and hoping they match up!).


8. Ok, let's see if I can explain this part! I kept the dress part inside out and slid the onesie into the top opening of the dress. Make sense?! :) Maybe the picture will help! (Make sure the front of your dress is facing the front of the onesie!


I pinned the dress around the onesie, lining up just under the arm pit. Sew around the edge of the dress, making a complete circle.

9. Flip the dress over the onesie and you are done! (unless you have some mistakes you need to fix like I did!) Admire your work...and if you are like me, become amazed that this project actually turned out well and cute to boot!

Front:


Back:


I already showed a picture of this to Lauren and she loves it! Yay! I can't wait for her to have Piper wear it and see what it looks like on a real live baby. :)

I am totally picturing A&M dresses for my next one. Hopefully I have a lil Aggie to sew for soon. I may or may not be looking in a certain someone's direction...

If you make one of these, I would LOVE to see how it turned out! And if you have some ways to make it easier, help a girl out, will ya?!

I link up to these parties!

Tip Junkie handmade projects

Feb 20, 2011

Valentine's Activities {part 2}

We finished up our Valentine's and heart activities this week. We took a day to go to the Children's Aquarium with daddy, so we didn't get to all my planned activities. But, that is ok!! I will just save them for next year!

My favorite activity was putting stamps on envelopes and mailing them in John's little mail box. I got the envlepes from Musings of Me. I wrote numbers on heart stickers and John had to match the heart 'stamp' to the correct envelope before mailing the envelope. It was a really cute activity and John did really well with counting how many hearts were on each envelope and picked the correct stamp. John also surprised me and was able to take the back off the stickers on his own too!


I made a file folder game using Musings of Me's size sort activity. I think that John is just getting really bored with sorting stuff because he will do one or two pieces and either say 'no' or 'mommy do'. I tried to make up so new creative activities for this upcoming week so hopefully he will be more engaged and interested!


We used a letter jumble from Moo Moo's & Tutus. I called out a letter and John had to cover it with a heart sticker. You can see he did 5 letters and got bored. :)


We used kisses to fill in the dots to make an H using Moo Moo's & Tutus printable. John LOVES chocolate so this activity was a big hit since he could eat the chocolate after. (well, some of the chocolate)!


John again used kisses to cover all the h's on this page from Moo Moo's & TuTus. He did it perfectly in about 5 seconds since he knew he could have the chocolate. So I guess having the correct incentive is key for John to complete an activity! :)


We ended the week by visiting the Dallas Children's Aquarium. John really enjoyed the trip, as did Matthew. It wasn't too crowded so we spent a good hour walking around looking at all the fish, turtles, sharks, sting rays, etc. I wish places like the Aquarium weren't an hour drive from our house so we could go more often!


I link up to these parties!